Audio compression is an incredible tool in music production, capable of transforming your mix from ordinary to extraordinary. But using compression effectively isn’t just about dialing in some settings; it’s about understanding its purpose and applying it strategically to achieve your sonic goals. In this guide, we’ll explore everything from the basics of compression to advanced techniques, helping you master the art of dynamic control in your mixes.
Why Do We Want to Use a Compressor?
Understanding why and how to use a compressor is vital for achieving polished, professional audio. On the market, we can find several types of audio compressors. But how do we know when to use one type over another? And how do we ensure we’re using it effectively?
It’s renowned that, with audio compression, it’s easier to cause damage to a track than to enhance it. Misuse can lead to lifeless, squashed audio. Yet, when used correctly, compression can make loud sounds quieter, quiet sounds louder, and the overall mix more balanced.
But don’t just mindlessly slap a preset compressor on every track. Instead, take time to understand why you want to use a compressor. By answering this question, you’ll be able to determine which compressor to use, when to use it, and how to set it up for the best results.
Shape Dynamics
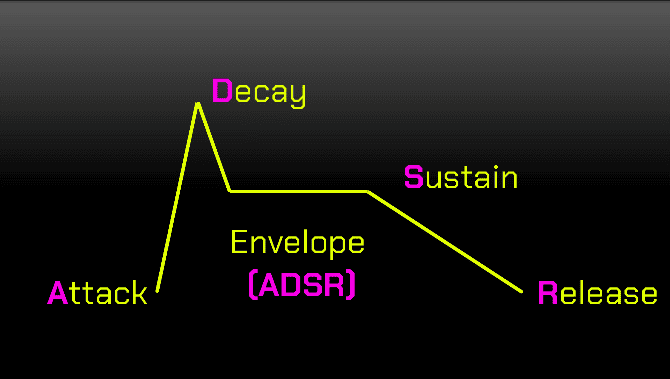
ADSR Shape Dynamics with Compression
A compressor is a powerful tool for controlling and shaping dynamics in audio. Put simply, it controls a signal’s volume peaks (transients) and makes levels more consistent.
What is a transient? Transients are brief spikes in volume that occur at the start of sounds, like the strike of a snare drum, the pluck of a guitar string, or the impact of a vocal consonant. These are the moments that add punch and character to your tracks.
With a compressor, you can adjust the attack (how quickly a compressor “kicks in”) and the release (how quickly a compressor stops reducing volume). For instance:
- A short attack time will tame transients, softening the initial impact.
- A long attack time will preserve the transients, adding punchiness to the sound.
By modifying this initial punch and the sustain of a sound, compressors also impact the sound’s envelope—or ADSR (Attack, Decay, Sustain, Release)—which shapes how the sound evolves over time.
Example: Use a moderate attack and release when compressing a snare drum to retain its punch. If needed, slow the attack to emphasize that sharp transient “crack.”
Potential Pitfall
Over-compressing can kill the dynamics you’re trying to enhance, making the track sound dull and lifeless. Always listen critically and adjust parameters to suit the material.
Limiting
Compressor as Limiter
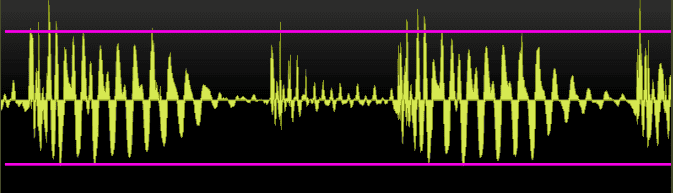
Compressors can also act as limiters to prevent clipping during recording, mixing, or mastering. Think of a limiter as a guardian that ensures your signal doesn’t exceed a set maximum level.
A compressor becomes a limiter when its ratio is set at 10:1 or greater and the threshold is set near or at the peak signal level. This “brick wall” ensures no audio peaks go over the threshold.
Example Use Case: During tracking, use a limiter to prevent signal clipping, which can create harsh digital distortion. For instance, apply light limiting to a vocal recording to capture expressive moments without distortion.
Potential Pitfall
While limiting prevents distortion, overuse can squash dynamics and rob the mix of its natural energy. Use sparingly—especially during mastering—to retain musicality.

Tone
Use Compressors for Tone
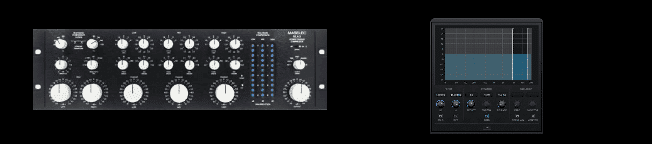
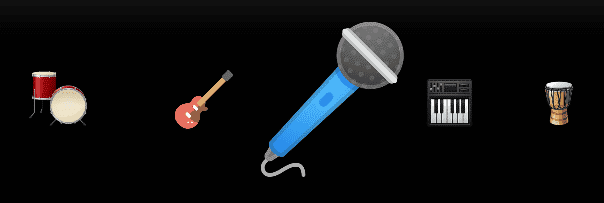
Compressors do more than shape dynamics—they can also help shape tone. Different compressor types—VCA, Optical, and Tube compressors—each impart unique sonic characteristics to audio.
Common Compressor Types and Uses:
- VCA Compressors (Voltage Controlled Amplifiers): Precise and clean, making them ideal for drums and bass tracks where controlled dynamics are crucial.
- Optical Compressors (Opto): Smooth and musical compression. These are fantastic for vocals, as they gently control peaks while enhancing warmth.
- Tube Compressors (Valve): Known for their pleasing harmonic distortion, they’re great for adding vintage character to tracks like room mics, guitars, or lead vocals.
Example: If you’re recording a vocal that needs a warm, vintage character, a Tube compressor can work wonders. On the other hand, for tight, punchy drum tracks, a VCA compressor might be your best friend.
Practical Tip
Experiment with different compressors to learn their tonal characteristics! Many software plugins emulate renowned hardware such as the LA-2A (Optical) and 1176 (FET), or API 2500 (VCA). Test them on various tracks to find which one enhances your material.
Specialized Compressors
Multiband Compressors
A multiband compressor lets you target and compress specific frequency ranges independently. This can prevent unwanted problems like muddy low frequencies or harsh mids in complex mixes.
Example Use Case: Use a multiband compressor to tighten the bass in a kick drum without affecting the snap of its higher frequencies. Or tame bright, shrill cymbals without dulling the midrange.
De-Essers
De-essers are specialty compressors used to reduce harsh “s” and “sh” sounds in vocal recordings. These work similarly to single-band compressors, but they target high frequencies specifically.
Example Use Case: When mixing a lead vocal, apply a de-esser to smooth out unpleasant sibilance and ensure the vocal remains clear and natural-sounding.
Potential Pitfall
Overusing a de-esser can result in an unnatural, lisp-like sound. Adjust settings carefully for subtle reduction.

Intelligibility
Compression to Enhance Intelligibility
Compression’s core function—making loud sounds quieter and quiet ones louder—can increase perceived loudness and clarity. This is especially useful for cohesive mixes.
For example, compressing a room microphone can amplify the reverb’s presence, gluing it into the overall mix. Similarly, compressors help maintain even vocal levels, improving intelligibility in spoken word or vocal-heavy tracks.
Example Use Case: Use a compressor to make backing vocals blend with the music without overpowering. Dial gentle compression on narration or podcasts to ensure every word is clear.
Potential Pitfall
Watch out for pumping artifacts, where the compressor becomes overly audible. These can distract from the mix if not controlled properly.
Proximity
Adjusting Proximity Effect With Compression
Compression can change how close—or far—an instrument or vocal feels to the listener. Faster attack and release settings push sounds further back, while slower attack settings bring them forward.
Example: A lead vocal should feel upfront and intimate, so use slower attack settings to allow the transient to come through. Conversely, background vocals can be pushed to the back with faster attack and faster release.
Pro Tip
Subtle EQ changes combined with compression can further shape proximity. Boosting high frequencies can make a sound seem closer, while reducing them can push it further back.
Isnt’ Enought? Read More About Audio Compression.
What Is Audio Compression?
At its core, audio compression reduces the dynamic range of an audio signal. This means it makes the loudest parts quieter and the quietest parts louder, creating a more consistent overall sound.
By evening out these dynamics, compression helps maintain a stable volume across a track or mix without sudden spikes or dips. This makes it a vital tool for producing polished, professional-sounding recordings.
Why Is Compression Important?
Understanding how and when to apply compression is essential for mixing and mastering. Misuse of compression can ruin a track’s energy and dynamics, while proper use can turn chaos into harmony.
For Example: Imagine you’re mixing vocals, and the singer alternates between soft whispers and powerful belting. Without compression, the whispers may get lost, and the belting could cause distortion. A well-adjusted compressor can balance these extremes, making the vocal sit perfectly in the mix.
Benefits of Compression
Enhancing Dynamics and Presence
Compression can bring life and cohesion to your tracks by reducing excessive dynamic range. This ensures every part of the sound is audible but not overwhelming.
Example: Applying compression to a drum mix can emphasize the energy in both the kick and snare, giving the drums more punch.
Adding Punch and Excitement
When applied correctly, compression adds punch and impact to an instrument or vocal. It helps highlight nuances while retaining control over the sound.
Example: A slow attack setting allows a drum’s initial transient to cut through, while the release tail sustains the energy of the hit, making the track feel more alive.
Balancing the Mix
Compression helps to balance the tonal characteristics of a mix, giving it a polished and cohesive feel. For instance, it can smooth out uneven guitar parts or ensure background vocals sit harmoniously with the lead.
The Pitfall to Watch Out For
While compression can work wonders, over-compression can crush the dynamics and make a mix sound lifeless. Always use it with intention and moderation.

Choosing the Right Compressor
Every compressor has unique characteristics and features that make it suitable for different applications. To harness compression effectively, it’s essential to understand the controls and types of compressors available.
Compressor Controls
- Threshold
- Sets the volume level at which the compressor begins to work. Sounds below this level remain unaffected, while those above are reduced.
- Tip: For vocals, set the threshold to capture only the loudest peaks for a natural result.
- Ratio
- Determines the degree of compression applied to the signal. For example, a ratio of 4:1 means for every 4 dB over the threshold, only 1 dB will pass through.
- Tip: Start with a low ratio (e.g., 2:1) for subtle control and increase it when more aggressive compression is needed.
- Attack
- Controls how quickly the compressor reacts to the input signal once it exceeds the threshold.
- Tip: Use slower attack times (e.g., 20ms) for punchy drums and faster attack times (e.g., 1ms) to tame sharp transients.
- Release
- Sets how quickly the compressor stops compressing after the signal drops below the threshold.
- Tip: Match the release time to the tempo of the track for a more natural feel.
- Makeup Gain
- Compensates for the volume lost due to compression, allowing you to bring the signal back up to its desired level.
- Tip: Always A/B your track with and without the compressor to ensure makeup gain retains the natural level.
Compressor Types
- Peak Compressor
- Reacts to sudden peaks in the signal. Ideal for controlling quick, sharp transients like drum hits.
- RMS Compressor
- Monitors the average level of a signal, offering gentler compression that works well on vocals or full mixes.
- Soft Knee Compressor
- Gradually applies compression as the signal approaches the threshold. Creates a smoother, more musical effect.
- Hard Knee Compressor
- Immediately applies full compression when the signal exceeds the threshold. Useful for aggressive sound-shaping.
Choosing the Right One:
- Use RMS/Soft Knee for natural vocal processing.
- Opt for Peak/Hard Knee compressors on drums or instruments needing precision.
Applying Compression Techniques
Gain Reduction Strategies
- Slow Attack, Fast Release: Retain the transient’s punch while maintaining control over the body of the sound.
- Watch the Gain Reduction: Keep an eye on your gain reduction meter; subtle tweaks (3-6dB) often work better than heavy-handed adjustments.
Advanced Techniques
- Parallel Compression
- Blend a heavily compressed signal with its uncompressed counterpart for a mix that retains dynamics while adding thickness.
- Example: Use parallel compression on a drum bus to enhance both power and clarity.
- Multiband Compression
- Apply compression to different frequency ranges individually.
- Example: Control booming bass frequencies in a mix without affecting sparkling highs.
- Sidechain Compression
- Allow one signal to “trigger” compression on another.
- Example: Use sidechain compression to make basslines duck behind a kick drum, creating space and rhythm.
Wanna Learn How to Use Audio Compression? Check Our Mixing Course Here
Common Issues and How to Solve Them
- Over-Compressed Sound: Reduce the ratio or increase the threshold to restore dynamics.
- Pumping or Breathing: Adjust attack and release times for a smoother response.
Mastering Compression
Mastering vs. Mixing Compression
- Mixing Compression: Applied to individual tracks or subgroups, focusing on controlling dynamics and enhancing tonal elements.
- Mastering Compression: Applied to the entire mix, with subtle compression that ensures consistency without altering the mix’s character.
Tip: For mastering, use lower ratios (1.5–2:1) with slower attack and release to avoid drastic changes to your mix.
Avoiding Over-Compression
- Use a soft knee and subtle ratio to maintain a track’s natural dynamics.
- Be mindful of how compression interacts with other processing, like EQ or saturation.
- Regularly compare your compressed track to the uncompressed version to ensure you’re enhancing, not flattening, the sound.

Conclusions
Compression is one of the most powerful—and often misunderstood—tools in music production. By setting clear goals and understanding how to adjust parameters like threshold, ratio, attack, and release, you can transform raw tracks into polished masterpieces.
Key Takeaways:
- Start by identifying your compression goal—dynamics, tone, or balance.
- Choose suitable compressors and settings based on the material at hand.
- Experiment with advanced techniques like parallel or sidechain compression.
- Avoid over-compression by listening critically and adjusting settings to suit the track.
Remember, there’s no one-size-fits-all approach. The best way to master compression is through experimentation. Try new settings and techniques, trust your ears, and discover the unique ways compression can enhance your sound. Happy mixing! 🎛️
Suggested Readings
Set Compression Goals
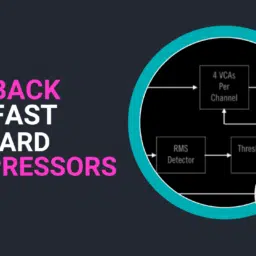
Feedback and Feedforward Compressors
Compressor Types and Applications
Audio Compression Controls
Why do we use Audio Compression?
Practice and Enjoy!