

But what exactly is reverb, and how can you harness its power to create ambiance in your music production projects?
In this article, we’ll dive deep into the world of reverbs, exploring its fundamental principles, various types, and essential techniques to help you create professional-sounding mixes that captivate and inspire.
Short Summary
- Understanding reverb is essential for creating an atmosphere in music production.
- Experimentation and tweaking of parameters help achieve the desired sound, while listening to natural reverberation can help blend recordings seamlessly.
- Knowing the different types of reverbs & avoiding common mistakes ensure professional sounding mixes with depth and space.
Understanding Reverbs: The Basics
Reverb is the result of sound waves bouncing off surfaces in space, creating a series of reflections and echoes that reach our ears and give us a sense of depth and atmosphere through reflected sound. Audio engineers and producers use reverb devices to have greater control over the sonic properties of the ambiance.
In music production, reverb is used to simulate the acoustic properties of different environments, adding a sense of space and depth to recordings.
The reverb signal plays a crucial role in achieving this effect, and the use of reverb sounds can greatly enhance the overall listening experience. Applying a reverb introduces a brand new signal in the mix that should play well with others, ensuring a cohesive and balanced sound.
From Short to Long Reverb – (Courtesy of Wikipedia)
There are two main types of reverb: natural and artificial. Natural reverb occurs when sound waves bounce off physical surfaces in a room, while simulated reverb is created using digital processors like reverb units or plugins.
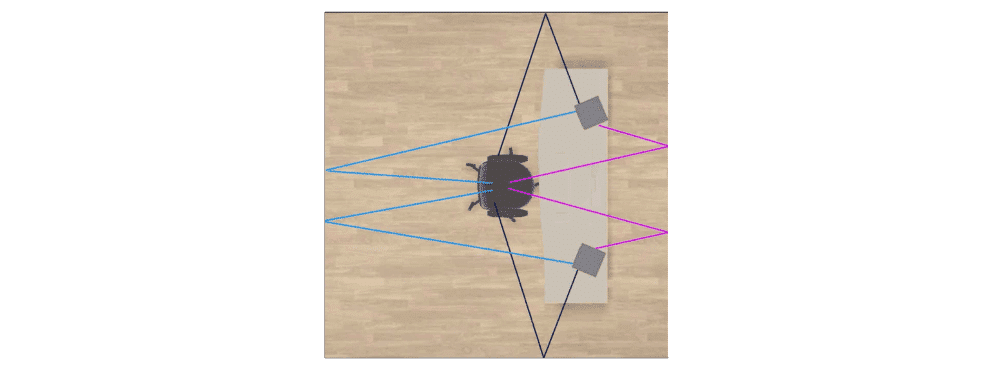
Learn More About Room Acoustics and Early Reflections
Definition of Reverb
Reverb, short for reverberation, is the persistence of sound after the original sound is produced. It occurs when sound waves reflect off surfaces in a space, creating a series of echoes that gradually decay over time. This natural phenomenon can be observed in any environment, from the smallest room to the largest concert hall. In music production, reverb is used to simulate these reflections, adding a sense of space and depth to a mix. By carefully applying reverb, producers can make recordings sound more natural and immersive, enhancing the overall listening experience.
Sound Waves and Reverberation
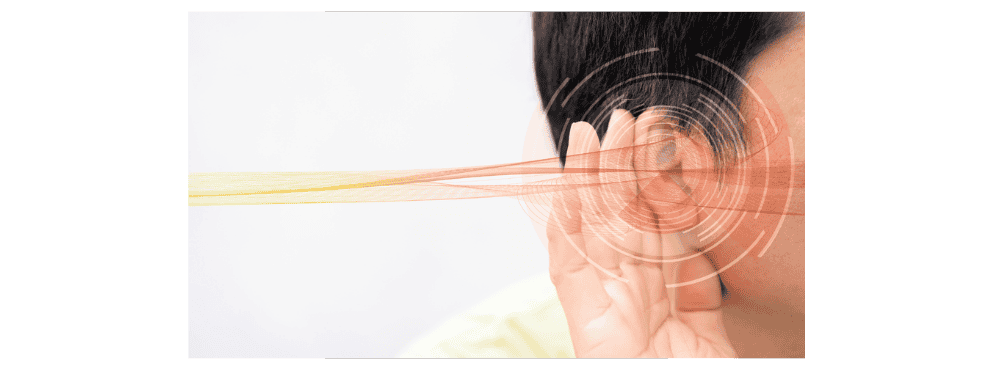
Sound waves are essentially vibrations in the air that travel in a wave-like pattern, created when an object like a speaker causes air molecules to vibrate.
These sound waves interact with surfaces in space by bouncing off them and reflecting back into the space, creating reverberation.
This reverberant sound is what gives a space its unique acoustic character and can be used in music production to create a sense of depth and atmosphere. Reverb can make a track sound like it’s playing in an empty room, long hallway, or large sanctuary.
To achieve the desired reverb effect, it’s crucial to understand how sound waves interact with surfaces and create reverb in a space.
By tweaking reverb parameters like pre-delay, decay time, and dry/wet mix, you can control the reverb’s character and tailor it to your needs.
This process of experimentation and fine-tuning ensures that your reverb effects enhance your mix, rather than detract from it.
Natural vs. Artificial Reverb

Natural reverb is created by acoustic waves bouncing off physical surfaces in a room, giving a sense of space and depth.
In contrast, artificial reverb is generated through digital means, such as reverb units or plugins. Convolution reverb is a type of artificial reverb that utilizes impulse responses – recordings of signals played in real rooms or sent through gear – to create highly realistic ambiance textures.
Algorithmic reverb, on the other hand, relies solely on digital algorithms to recreate the sound of spaces, often resulting in unique and versatile reverb effects. Algorithmic reverb simulates acoustic spaces through mathematical algorithms, offering a wide range of creative possibilities.
Both natural and artificial reverb play a vital role in shaping the sound of a mix.
While natural reverb can help to create a sense of authenticity and realism, artificial reverb offer a vast array of creative possibilities, from classic plate and spring reverbs to experimental gated reverb and reverse reverb effects.
By understanding the differences between these types of reverb and how they can be used in music production, you can unlock new sonic dimensions and take your mixes to the next level.
Different Types of Reverbs and Their Applications

There are several types of reverbs commonly used in music production, each with its distinct sonic characteristics, ambiences, and applications. Room, Hall, Chamber, Plate, and Spring reverbs are all popular choices, each offering unique ways to enhance your mix and create a sense of space and depth.
By understanding the distinct qualities of each reverb type and how they can be used in different contexts, you can make informed decisions about which reverb effects to apply in your music production projects.
Room Reverb
Room reverb is designed to mimic the natural sound of an acoustic space, such as a room, providing a sense of closeness and intimacy. Room reverb simulates the reflections of small acoustic spaces.
It typically features a shorter decay time than other reverb types, making it ideal for creating depth and texture in vocals, drums, and other instruments.
Room reverb also excels at creating a sense of space and atmosphere in a mix, helping to bring your recordings to life.
To get the most out of room reverb, it’s important to experiment with different settings and find the right balance between the direct sound and the reverberated sound.
Adjusting parameters such as pre-delay, decay time, and dry/wet mix can help you achieve the desired effect, whether it’s a subtle sense of space or a more pronounced, immersive ambiance.
Download a Free Room Plugin Here
Hall Reverb
This reverb type is designed to emulate the sound of a traditional concert hall, providing a grand and spacious reverb effect. Hall reverb simulates the acoustics of large concert halls which are designed for a long decay.
It’s particularly well-suited for instruments such as strings and pads, as it adds depth and richness to their sound.
Hall reverb can also be used to create a sense of space and depth in a mix, giving your recordings a larger-than-life quality.
When using this reverb type in your mix, it’s essential to carefully control the balance between the dry signal and wet signals.
This can be achieved using EQ or compression, helping to ensure that the reverb effect enhances the mix without overpowering or muddying the original sound.
By experimenting with different hall reverb settings and paying close attention to the overall mix, you can create a spacious and immersive soundscape that adds depth and dimension to your music.

Chamber Reverb
Chamber reverb is an artificial reverb effect created by using actual physical spaces, such as reflective surfaces in rooms, corridors, or stairwells. Chamber reverb uses echo chambers that capture sound reflections in a separate room.
By placing a speaker and microphone within these spaces, engineers were able to capture the unique reverb characteristics of the environment and apply them to audio recordings.
This technique, known as the “Echo Chamber” reverb, allows for the creation of intimate and unique reverb effects that can add character and depth to your music.
While modern digital reverb plugins offer a wide range of reverb effects, chamber reverb remains a popular choice for producers seeking a more organic and natural-sounding reverb effect.
By experimenting with different chamber reverb settings and listening closely to the resulting reverberation, you can create a unique atmosphere and sense of space that enhances your mix and brings your recordings to life.
Plate Reverb
Plate reverb is a type of artificial reverb that involves suspending a large sheet of metal within an enclosed space. Plate reverb generates sound using a vibrating metal plate and produces a dense yet smooth sound.
When a dry audio signal is played through a transducer attached to the metal plate, the resulting vibrations create a reverberation effect that is captured by a contact microphone.
Plate reverb is known for its smooth and bright sound, making it an ideal choice for vocals, drums, and guitars.
To achieve the desired effect with plate reverb, it’s important to experiment with different settings and find the right balance between the direct sound and the reverberated sound.
You can adjust the pre-delay, decay time, and dry/wet mix to achieve your desired effect, from a subtle sense of space to a more immersive ambiance. Adjusting parameters such as pre-delay, decay time, and dry/wet mix can help you achieve the desired effect, whether it’s a subtle sense of space or a more pronounced, immersive ambiance.
By delving into plate reverb settings and giving emphasis to the mix, you can craft a captivating auditory landscape that elevates and enriches your music.
Spring Reverb
Spring reverb is a type of artificial reverb that utilizes the physical properties of coiled springs to create a simulated ambiance.
When a dry audio signal is played through a transducer attached to one end of the spring, the resulting vibrations travel through the spring and are picked up by a contact microphone at the other end.
Spring reverb is known for its distinct “boing-boing” sound, making it an ideal choice for guitars and vocals.
To get the most out of spring reverb, it’s important to experiment with different settings and find the right balance between the direct sound and the reverberated sound.
By adjusting parameters like pre-delay, decay time, and dry/wet mix, you can achieve the effect you want – whether it’s a subtle sense of space or a more immersive ambiance.
As always, experimenting with spring reverb settings and focusing on the mix can enhance your recordings and create a unique atmosphere and sense of space.
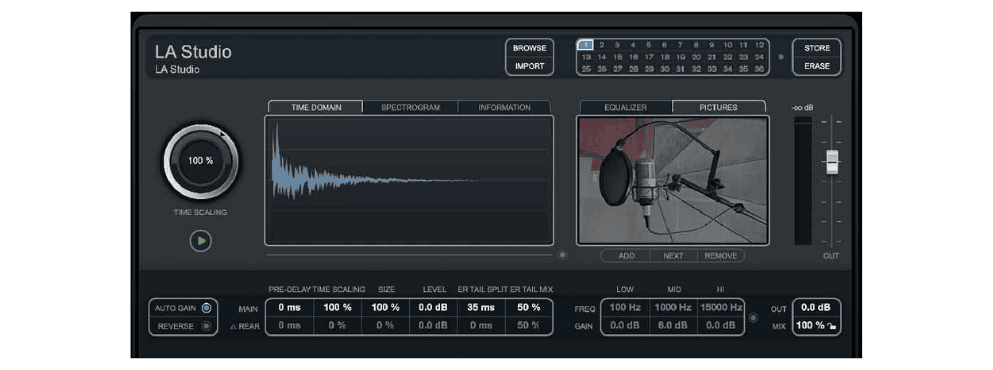
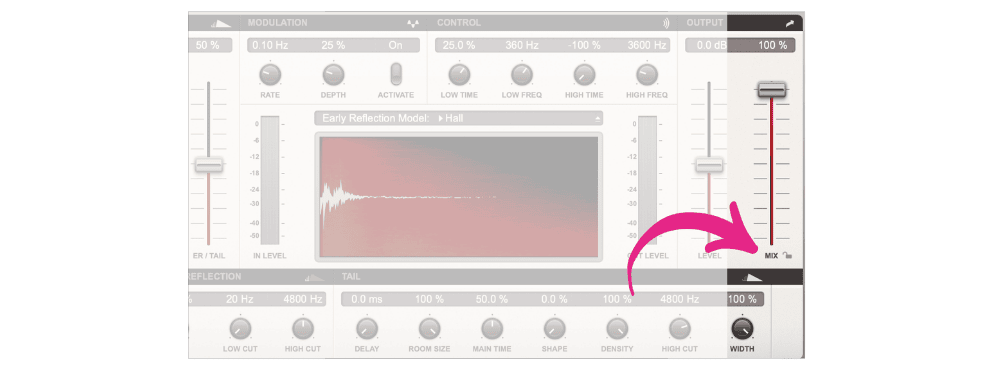
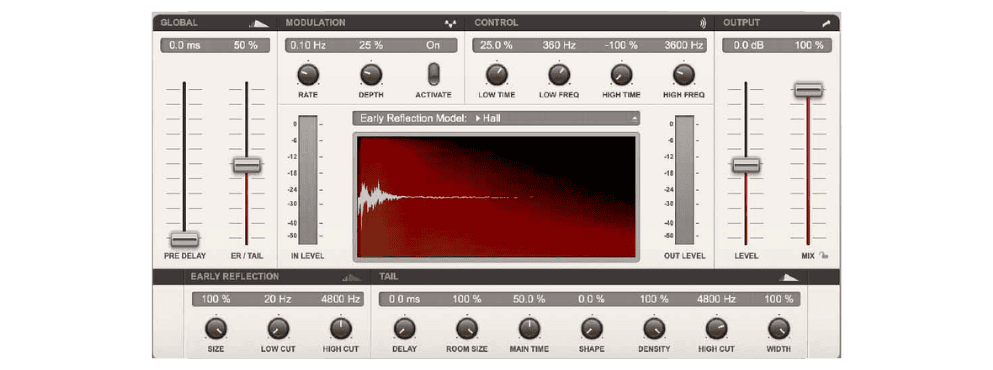
Essential Reverb Parameters and Techniques

To truly harness the power of reverb in your music production, it’s essential to understand the key parameters and techniques for controlling and shaping reverb effects.
Pre-delay, decay time, size, dry/wet mix, and EQ are crucial tools for sculpting the perfect reverb sound, allowing you to create a sense of space, depth, and atmosphere in your mixes. High-frequency damping is a feature in many reverb plugins to simulate natural absorption, adding realism to the reverb effect.
Let’s take a closer look at each of these parameters and how they can be used to fine-tune your reverb effects.
Pre-Delay
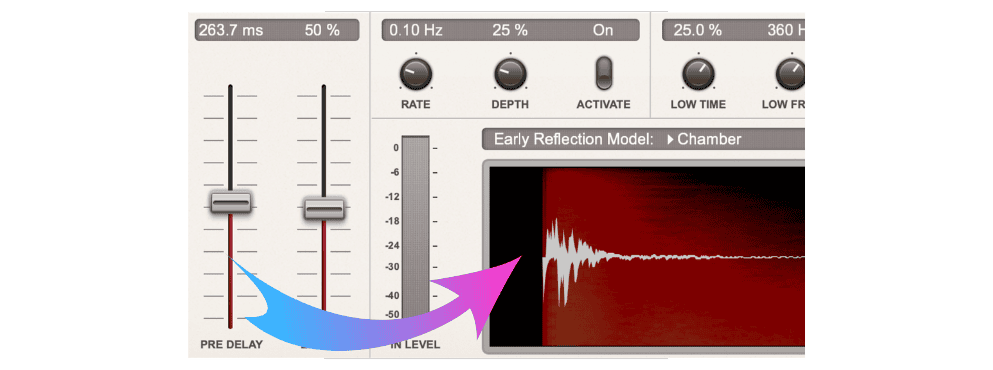
Pre-delay is the time between the direct sound and the first reverb reflection. Pre-delay introduces a short delay before the reverb signal begins its decay cycle.
By adjusting the pre-delay parameter, you can influence the perceived depth and distance of the sound within the mix. Increasing the pre-delay time can help the dry signal pop better in the mix, making it stand out more clearly against the reverb. Using a longer pre-delay can help make vocals pop more in a mix, adding clarity and presence to the performance.
Longer pre-delay times can help to create a sense of spaciousness, while shorter pre-delay times can make the sound appear closer and more intimate.
When setting the pre-delay for your reverb effect, it’s important to consider the size and characteristics of the space you are trying to emulate.
For example, in larger spaces like concert halls, pre-delay times are typically longer, as it takes more time for the sound to travel, hit a surface, and bounce back to the listener.
Experimenting with different pre-delay settings can help you find the perfect balance between depth and intimacy in your mix.
Decay Time

Decay time, also known as the reverb decay time or RT60, is the amount of time it takes for the reverb tail to decay by 60 dB in level at 1 kHz.
By adjusting the decay time parameter, you can control the length of the reverb tail and how long it lingers before fading away.
This parameter is particularly important when creating a sense of space and depth in a mix, as it can help establish the size and character of the acoustic environment.
To achieve the desired reverb effect, it’s crucial to find the right balance between the direct sound and the reverberated sound. Here are some tips to help you find that balance:
- Longer decay times can create a more spacious and immersive atmosphere.
- Shorter decay times can make the sound appear more focused and intimate.
- Experimenting with different decay time settings can help you find the perfect balance between space and intimacy in your mix.
- Using EQ on reverb signals can help prevent low and high frequency build-up in a mix, ensuring clarity and precision.
- High damping values absorb high frequencies in a reverb signal, allowing for a smoother and more controlled sound.
- Longer decay times can create a more spacious and immersive atmosphere.
- Shorter decay times can make the sound appear more focused and intimate.
- Experimenting with different decay time settings can help you find the perfect balance between space and intimacy in your mix.
Dry/Wet Mix
The dry/wet mix parameter is used to adjust the balance between the unprocessed (dry) audio signal and the processed (wet) reverb output sound signal.
By tweaking the dry/wet reverb mix, you can control the overall level of reverb in your mix and ensure that the effect enhances the sound without overpowering or muddying the original recording.
When adjusting the dry/wet mix, it’s important to listen carefully to the resulting sound and make any necessary adjustments to ensure that the reverb effect complements the direct sound without overwhelming it.
Experimenting with different dry/wet mix settings can help you find the perfect balance between the direct sound and the reverberated sound, enabling you to create a rich and immersive soundscape that enhances your music production. Reverb can be used on individual tracks or added to a reverb bus for multiple sounds, providing flexibility in shaping your mix. The amount of reverb added to a mix is often relative to the density of other sounds in the mix, ensuring clarity and cohesion.
Reverb Signal and Sound
The reverb signal refers to the audio signal that has been processed to create a reverberated sound. This is typically achieved by sending the original audio signal through a reverb plugin or hardware unit, which simulates the reflections and echoes of a physical space. The resulting reverb sound is a blend of the original signal and the simulated reflections, creating a sense of space and depth. This combination helps to place the listener within an acoustic environment, making the music feel more three-dimensional and engaging.
Understanding Reverb Signal
The reverb signal is composed of several key components: direct sound, early reflections, and late reflections. The direct sound is the original audio signal that reaches the listener first. Early reflections are the initial echoes that bounce off nearby surfaces and arrive shortly after the direct sound. These reflections help to define the size and shape of the acoustic space. Late reflections, or the reverb tail, are the subsequent echoes that continue to bounce around the space and gradually decay over time. Understanding these components is crucial in music production, as it allows producers to control the amount and type of reverb used in a mix, ensuring that the reverb enhances rather than overwhelms the original sound.
Exploring Reverb Sounds
Reverb sounds can be categorized into several types, each with its unique characteristics and applications. Plate reverb, for instance, involves a large metal plate that vibrates to create a bright and smooth reverb sound, often used on vocals and instruments. Spring reverb, on the other hand, uses coiled springs to produce a distinctive “boing” sound, making it a popular choice for guitars. Room reverb simulates the reflections of a small acoustic space, providing a sense of intimacy and closeness. Chamber reverb, created by capturing sound reflections in a physical echo chamber, offers a more organic and natural-sounding reverb effect. Hall reverb emulates the acoustics of large concert halls, adding depth and richness to instruments like strings and pads. By understanding the unique qualities of each reverb type, producers can choose the right reverb sounds to enhance their mixes.
Top Reverb Plugins for Music Producers
In today’s digital age, there is no shortage of high-quality reverb plugins available to music producers. Some examples include:
- Steinberg Revelation
- Audio Ease AltiVerb 7
- HOFA IQ-Reverb
- H-Reverb by Waves
- TSAR-1 by Softube
- Lexicon 224 by UAD, EMT 140 and 250 by UAD
These plugins provide incredibly realistic ambiance textures and versatile and creative reverb effects, offering endless possibilities.
When selecting a reverb plugin for your music production projects, it’s essential to consider the specific types of reverb effects you wish to create and the unique characteristics of each plugin.
By doing so, you can ensure that you have the right tools at your fingertips to craft the perfect reverb sound for your mix.
Tips for Using Reverb Effectively in Your Mix
Using reverb effectively in your mix is a delicate balancing act that requires careful attention to detail and a deep understanding of the various reverb types and parameters at your disposal. To make the most of reverb in your music production projects, consider:
- Experimenting with different reverb settings
- Trying out both mono and stereo reverbs
- Listening closely to the natural reverberation in your recordings or spaces
By following these tips and applying a keen ear, you can create professional-sounding mixes that captivate and inspire.
Experimentation and Tweakings
Taking the time to experiment with different reverb settings is crucial to achieving the desired sound in your music production projects.
By tweaking parameters such as pre-delay, decay time, and dry/wet mix, you can fine-tune the reverb effect to suit your specific needs and create a sense of space, depth, and atmosphere in your mix.
Don’t be afraid to think outside the box and push the boundaries of conventional reverb techniques. By trying out different types of reverbs, such as:
- Room
- Hall
- Chamber
- Plate
- Spring Reverbs
So, by experimenting with unconventional settings like gated reverb, you can discover new sonic possibilities and compose a unique sound that sets your music apart from the rest.

Mono vs. Stereo Reverb
When it comes to choosing between mono and stereo reverb, it’s essential to consider the specific needs of your mix and the desired sonic effect.
Mono reverb provides a more focused and centered sound, making it ideal for mono audio tracks or when a close and intimate sound is desired.
However, mono reverb doesn’t create a wide stereo image, which may be an issue if you’re seeking a more immersive soundscape.
Stereo reverb, on the other hand, creates a wide stereo image that can add depth and dimension to your mix, making it ideal for creating immersive soundscapes and enhancing the overall sense of space in your music.
By experimenting with both mono and stereo reverbs and carefully considering the specific needs of your mix, you can find the perfect balance between depth and intimacy and create a captivating sonic experience for your listeners.
Listening for Natural Reverberation
Paying close attention to the natural reverberation present in a recording or space is a crucial aspect of using reverb effectively in your mix.
By listening for the natural reflections of sound that reach your ears from the surrounding environment, you can better understand the size, shape, and material of the space, allowing you to adjust your audio production accordingly.
To ensure that your reverb effects blend seamlessly with the natural reverberation in your recordings, it’s essential to carefully adjust parameters such as pre-delay, decay time, and dry/wet mix.
By striking the right balance between the direct sound and the reverberated sound, you can create a rich and immersive soundscape that enhances your mix and brings your recordings to life.
EQ and Compress Your Reverb
EQing and compressing your reverb can significantly enhance and control the overall sound. EQing the reverb allows you to adjust the tone and frequency response, ensuring that the reverb complements the rest of the mix without causing muddiness or harshness. For instance, cutting low frequencies can prevent the reverb from overwhelming the mix, while boosting high frequencies can add clarity and presence. Compressing the reverb helps to control its dynamics, ensuring that the reverb remains consistent and balanced throughout the track. By carefully EQing and compressing the reverb, producers can create a more polished and professional sound that enhances the overall mix.
Common Reverb Mistakes and How to Avoid Them

While reverb is a powerful tool in music production, it’s essential to use it wisely to avoid common mistakes that can detract from your mix.
Some frequent pitfalls include using too much reverb, which can muddle the clarity and presence of dry signals, and applying multiple reverbs or different spaces, resulting in an inconsistent stereo image and sense of space in the mix.
Understanding the role of reverb in music production can help you make better decisions when applying this effect to your tracks.
To avoid these issues, it’s crucial to carefully consider the specific needs of your mix and apply the appropriate reverb settings and techniques.
By doing so, you can create clean, professional-sounding mixes that showcase your music in the best possible light.
Summary
In summary, reverb is a powerful tool that can transform your music production projects by adding depth, space, and atmosphere to your mix.
By understanding the fundamental principles of reverb, exploring different types of reverbs and their applications, and mastering essential reverb parameters and techniques, you can harness the full potential of reverb in your music production projects.
Whether you’re looking to create an intimate, close sound or a grand, immersive soundscape, the possibilities are virtually endless. So dive in, experiment, and let the magic of reverb elevate your music to new heights.

Frequently Asked Questions
What is a Reverb in Music?
Reverb is an audio effect that creates a natural ambiance by simulating the reflections of sound off surfaces in an acoustic space.
It’s also known as reverberation and refers to the lingering decay of a sound after it has been produced.
What is the Purpose of Reverb?
Reverb helps create a sense of space and depth in your mix, providing the listener with context clues as to where the performance is taking place and each instrument’s location.
It’s like having front-to-back pan controls for your sound.
What are the 4 Different Types of Reverb?
The 4 types of reverb are Rooms, Halls, Chambers, and Plates, each offering its own unique sound. Ambiences are a slightly different spin on the concept.
Every reverb type is subject to the interpretation of the designer, making for a unique sonic experience.
What is Reverb Music?
Reverb is the persistence of sound after a sound is produced; it’s short for reverberation and refers to the lingering decay of a sound as it bounces off surfaces.
In music production, reverb is an audio effect used to simulate ambiance as if it were occurring in a natural environment.
So…Thank you so much for taking the time to read this blog post on HTMEM!
We truly appreciate your support.
Don’t forget to explore our extensive collection of diverse and enriching courses, designed to cater to a wide range of interests and learning objectives.
We are confident that you will find something that captivates your curiosity and helps you further expand your knowledge and skills.
Suggested Reading
Beginner’s Guide: Everything You Need to Know About Production of Music
Now Practice and Enjoy!