Understanding Automation in Cubase
Automation is a powerful feature in Cubase, allowing for creative control over parameters over time. It enables users to automate volume, panning, and effect parameters, bringing a dynamic and evolving sound to your tracks.
Automation can also bring synths to life and add interest to sonic tracks, creating evolving soundscapes and intricate audio dynamics that engage your audience.
In Cubase, you can automate nearly every parameter within the mix console (the mixer), virtual instruments, and plugins, allowing you to essentially automate the entire mix.
Deciding when, where, and how to apply automation can be challenging, especially when working with existing automation data. Understanding the project’s needs and the emotional impact you want to convey is key to effective automation.
I personally enjoy utilizing automation during the drop, but essentially, it can be used to accentuate percussion with reverb, build tension, or create fade-ins by applying low or high pass filter automation.

Working with Automation Data
Automation can be added to various track types, including audio, MIDI, instrument, group, effect, sampler, and VCA tracks. This versatility allows for comprehensive control across your entire project.
Each track can host multiple automation lanes, one for each automatable parameter. This organization helps manage complex projects and keeps your automation data easily accessible. Automation data is shown as a continuous curve, with breakpoints representing manual value changes. These breakpoints can be adjusted to fine-tune the automation effect.
There are two primary methods to create automation.
You can create automation data offline by drawing and manipulating breakpoints and curves in the project window. This method allows you to precisely control and edit automation events.
Automation can also be created in real-time while Cubase is playing, by placing the track or parameter in Automation Write mode. This approach captures spontaneous changes and creative impulses during playback.
Automation Curves Types
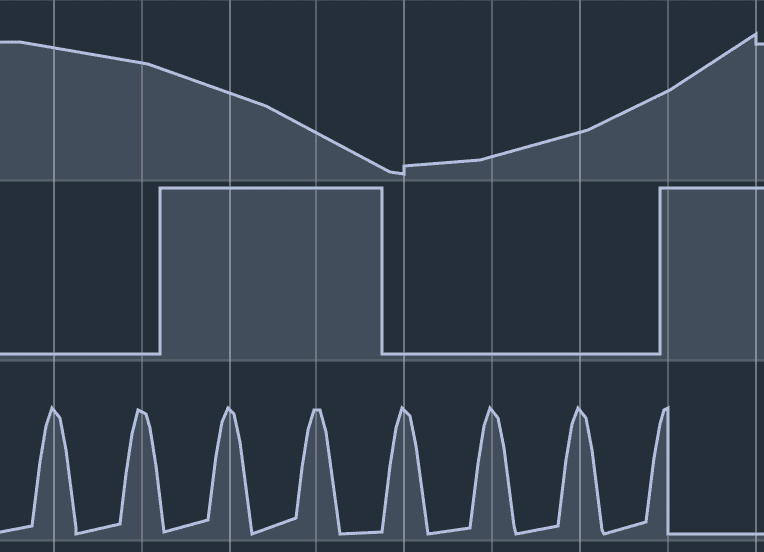
Within a Cubase project, parameter value changes over time are represented as curves on automation tracks. There are two types of automation curves:

- Jump curves: These are used for parameters that switch between on and off states, such as mute.
- Ramp curves: These are created for parameters that produce a continuous range of values, like fader or encoder movements.
Writing Automation Data – The Easy Way
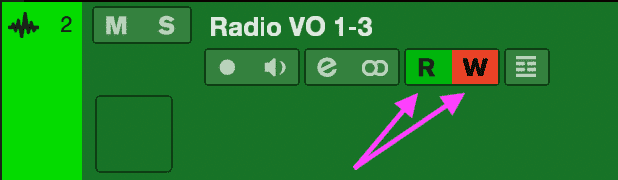
Writing automation data in Cubase is straightforward when you know the right steps, thanks to the read and write automation buttons. These buttons can be found in various places, such as within a plug-in window, a virtual instrument, or the channel strip.
Let’s say you want to automate the Pan for a specific channel in the mix console:
- Click the “W” button on the channel to enable writing automation data.
- Start playback and adjust the Channel Pan as desired.
- Stop playback in Cubase.
- Turn off the Write automation button.
- Ensure the “R” button is activated to read the automation data on the channel.
- Rewind and enjoy the results of your automation.
And there you have it!
Easy peasy.
Automation Lanes and Curves
Learn how to effectively manage automation lanes for cleaner project organization.
Proper management ensures that your automation data is easy to navigate and edit. Discover how to use automation curves to create smooth transitions and dynamic changes.
These curves can add depth and interest to your music, enhancing the emotional impact, tension ad energy of your tracks.
Displaying Automation Data – Simplified
When you’ve written some automation, it might be challenging to view all automation data, especially if multiple parameters have been automated simultaneously.
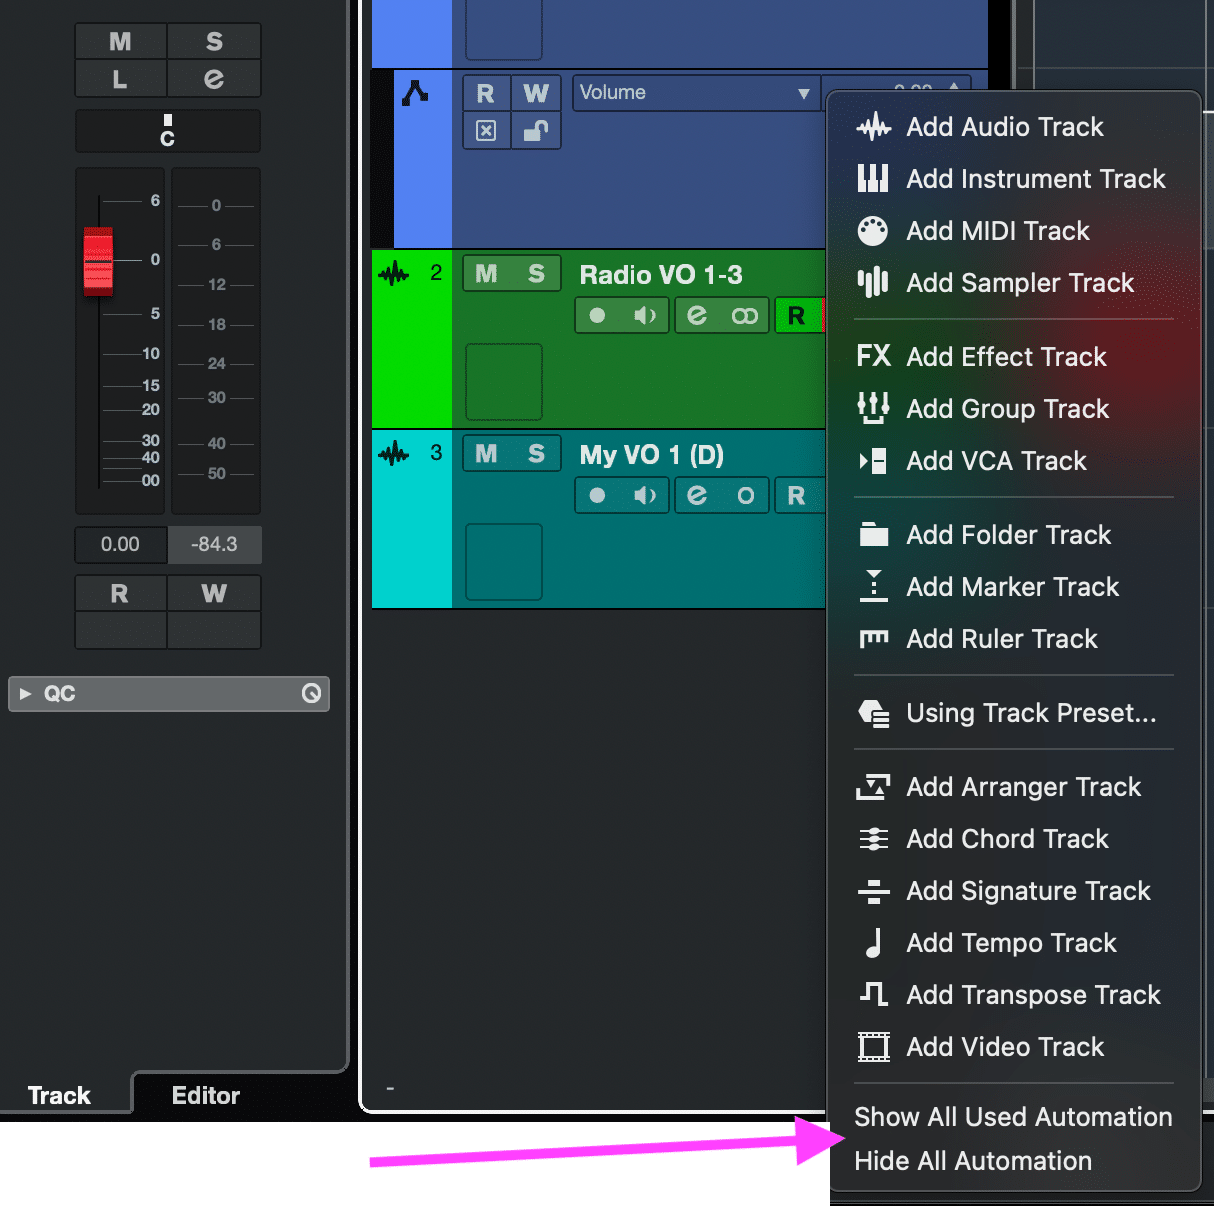
The simplest way to display automation data is by accessing the context menu from a space in the tracklist and selecting “Show All Used Automation.”
This action will reveal all automation for every track in the project. If you wish to hide all the automation data quickly, just access the context menu again and choose “Hide All Automation,” and you’re all set.
Now, the Automation Panel (in Cubase PRO only), allows you to set global automation settings and modes, such as reduction level and control release. This panel is essential for managing complex automation tasks and ensuring smooth transitions.
To open the automation panel, you can:
- Select Project > Automation Panel.
- On the Project window toolbar, click Open Automation Panel.
- Or simply Press F6.
Automation Modes
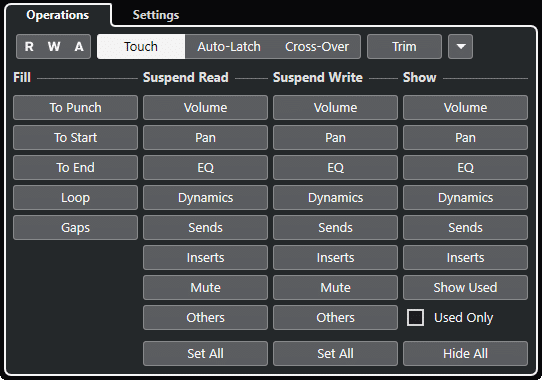
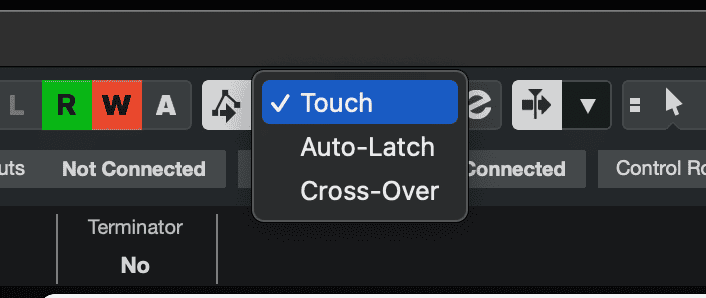
Understanding the different automation modes, such as Touch mode, Auto-Latch mode, and Cross-Over mode, is crucial for effective automation. Each mode offers unique ways to interact with automation data, providing flexibility in how changes are recorded and applied.
In Cubase, the automation modes “Touch,” “Auto-Latch,” and “Cross-Over” serve different purposes for handling automation data:
- Touch Mode: This mode is useful for making temporary changes to a parameter. Automation data is written only while you are actively touching a control. Once you release the control, the parameter returns to its previously set value.

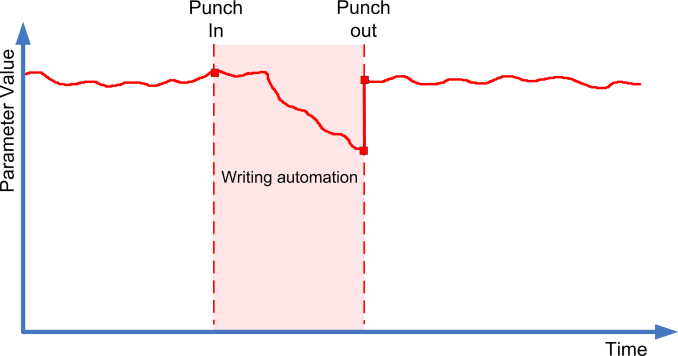
- Auto-Latch Mode: In this mode, automation data is written as soon as you touch a control and continues to be written until you stop playback or disable the Write function. This allows for more extended changes compared to Touch mode.
- Cross-Over Mode: This mode allows for manual returns to ensure smooth transitions between new and existing automation settings. Automation data continues to be written as long as playback lasts or Write is enabled. Punch out occurs automatically when you cross over an existing automation curve after touching the parameter a second time.
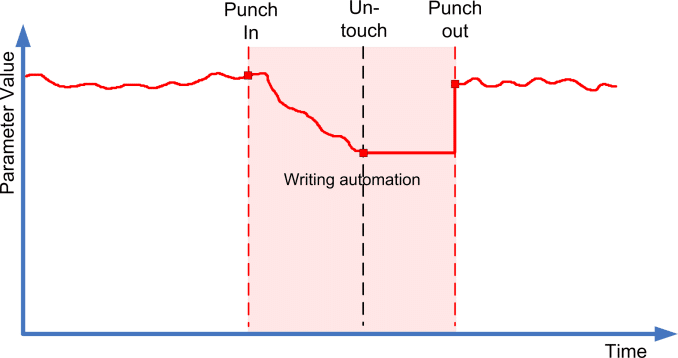

In Cubase, “Punch Out” is part of the “Punch In and Punch Out” recording feature. This feature uses a pair of markers to define specific start and stop points for recording. The “Punch In” position marks where recording begins, while the “Punch Out” position marks where recording stops. These positions are typically locked to the left and right locator positions, respectively, but can be adjusted independently if needed.
Now, try yourself but, to begin with automation without adding unnecessary complexity, I recommend starting with Touch mode. This mode is an excellent introduction to using automation effectively.

Advanced Automation Techniques
Using the Line tool, you can switch to other shape tools, including parabola, sine, triangle, and square, to draw automation curves. These shapes can add rhythmic or harmonic interest to your automation.
The Scale box allows you to morph the shape of your automation curve in different ways, providing more flexibility than just moving the curve. This feature is useful for creating complex and evolving parameter changes.
You can move automation data freely on the timeline, and Cubase will snap it to whatever settings you are using in the Snap section. This snapping ensures that automation changes align perfectly with your project’s grid.
Temporarily bypassing the snap behavior by holding down the command (Mac) or control (PC) key while dragging allows for more precise control. This technique is useful for making subtle adjustments that don’t conform to the grid.
Using the Draw tool, you can add automation points to any track, and the Pen tool allows you to add automation points to any track. These tools provide intuitive ways to input and edit automation data. MIDI tracks have different automation modes, and CC7 automation can be used in track and MIDI > CC
MIDI Automation Setup. Understanding these modes is vital for effectively automating MIDI parameters.
Parameter Automation allows for particular parameter control, and automation means recording the values for a particular MixConsole or effect parameter. This capability is essential for creating detailed and expressive mixes.
Volume Automation can be used in a track’s automation lane, and instrument tracks can be automated using parameter control. This control allows for precise adjustments to volume and other parameters over time.
PRO TIP: For a more impactful drop, try gently lowering the volume just before it hits, then quickly bringing it back up as the song kicks in. This subtle trick adds depth and emotion to the moment.
Final Conclusion
Automation is a powerful tool in any DAW, and Cubase makes it easy to use.
With the ability to automate almost every parameter in your project, you have complete control over the mix and can create dynamic and expressive tracks. Whether you prefer drawing in automation curves or using real-time recording with your MIDI controller, Cubase has you covered. So go ahead and experiment with automation in your next project, and take your mixes to a whole new level!

Suggested Readings
10 Best Headphones for Electronic Music Enthusiasts
Practice and enjoy!