Introduction
Welcome to your go-to guide for setting up an audio interface.
In this blog post, we’ll walk through the basics of setting up your interface, by providing tips for beginners to get started.
The way you set up audio interfaces is similar for many different DAWs. So let’s have a look at all the common recurrences you need to face when installing this device to elevate your music production quality.
How to Set Up an Audio Interface for Beginners
What is an Audio Interface?
An audio interface is a hardware device that bridges your instruments or microphones and your computer.
Its primary function is to convert analog signals into digital audio, enabling seamless integration with your Digital Audio Workstation (DAW).
This conversion improves sound quality and expands your routing options, making it indispensable for recording music, podcasts, and voiceovers.
If you want to get deeper into digital signal conversion, check this course: Acoustic, Analog, and Digital Signals Explained.

Choosing the Right Audio Interface
Determine Your Needs
Before selecting an audio interface, assess your production requirements. Consider the number of inputs and outputs you’ll need, including the need for multiple inputs, based on the type of projects you plan to undertake. This ensures that the interface can handle your demands without bottlenecks.
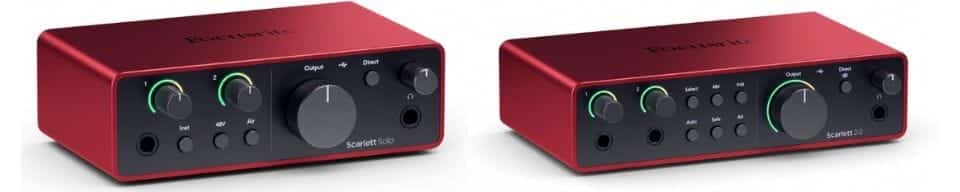
Research Options
Explore popular models like the Focusrite Scarlett Solo 3rd Generation, Audient iD4 MkII, or Behringer U-Phoria UM2. Each offers unique features tailored to different needs, so compare them to find the perfect fit for your setup.
Connection Types
When choosing your new interface, pay attention to the connection type. Are you going to use USB, Thunderbolt, or MIDI?
To ensure a smooth workflow and prevent connectivity issues, ensure compatibility with your laptop or PC, Operating System, and DAW, are indispensable conditions to confirm.

Preparing for Setup
Gather Necessary Equipment
Based on your interface and computer specifications, identify and gather the necessary cables and accessories Ensure you have the appropriate cables for your audio inputs, such as XLR or jack cables for connecting microphones and instruments.
This preparation will save you time and frustration during the setup process.
Install Drivers
Download and install the latest drivers for your audio interface before connecting it to your PC. These drivers ensure your computer recognizes the interface, optimizing performance and reducing potential issues.
Connect the Interface
Use a USB or Thunderbolt cable to connect your interface to your computer. A stable connection is crucial for integrating your hardware with your DAW effectively.

Setting Up Your Audio Interface
Connect Instruments and Microphones
Use jack or XLR cables to connect microphones and instruments to the interface’s inputs. Ensure that the microphone input is properly configured to enhance weak signals and provide optimal recording quality. Proper connections directly impact audio quality, so choose cables that match your needs.
Connect Monitor Speakers
Connect your monitor speakers to the interface’s outputs to accurately monitor your sound. This setup allows you to hear your recordings as they truly sound. If possible, always use a balanced connection (XLR or TRS) to remove possible noises from being heard on your speakers.
Configure the Driver in your DAW
Select the appropriate audio driver within your DAW or audio software to ensure your setup is ready for recording and playback. The correct configuration ensures your setup is ready for recording and playback. Make sure to download and use the latest audio driver, typically available on the manufacturer’s website for your specific audio interface model.

Understanding Audio Interface Controls
Basic Controls
Get familiar with the controls on your interface, such as the master volume knob and input gain knobs. These controls are essential for adjusting the input signal levels to achieve the desired sound.
Phantom Power
Understand the phantom power switch, especially if you’re using condenser microphones. This feature provides the necessary power for your microphone to be able to capture high-quality audio.
Direct Monitoring
Especially during the recording sessions, utilize direct monitoring to minimize latency. This feature allows you to hear your audio in real-time, making it easier to record accurately without delays.

Optimizing Your Audio Interface for Recording
Set Input Levels
Adjust the input levels to match your connected devices for optimal audio recording quality. Correct settings prevent distortion and ensure clear, crisp audio.
Adjust Output Levels
Fine-tune the output levels to achieve a balanced sound mix that enhances your recordings. Check this course if you want to understand more about How to Mix your Music (With Free Plugins).
Signal Testing
Regularly test and adjust gain settings to maintain consistent audio quality across different recording sessions.
Create an audio track in your DAW to test and adjust gain settings, ensuring consistent audio quality across different recording sessions.
A good way to do that is to use a virtual VU meter, you can find a free one here.

Buffer Size and Latency
Understanding Buffer Size
Buffer size plays a significant role in audio processing. A smaller buffer reduces latency but demands more processing power and may introduce clicks and cracks.
On the other hand, a larger buffer provides stability at the cost of increased latency (direct monitoring can help with latency).
Adjust the buffer size based on your computer’s performance and the complexity of your project to achieve an optimal balance between latency and processing power.

Managing Latency
Latency is the delay between input and playback audio signals. To minimize latency, optimize your driver settings and buffer size, ensuring a smooth audio experience.
Check this course if you want to understand more about Acoustic, Analog, and Digital Signals Explained

Troubleshooting Common Issues
Common Problems
Low volume or latency issues can arise from setup errors or hardware malfunctions. Identifying these issues early on helps in troubleshooting effectively.
Solutions
Simple fixes like verifying the power supply and checking cable connections often resolve these common problems. Ensuring everything is securely connected is key.
Resources
Utilize user manuals and manufacturer websites for detailed troubleshooting guides. These resources provide additional support for resolving complex issues.
Audio Interfaces for Beginners
Importance for Beginners
To enhance your recording quality, avoid relying on the built-in audio interface of your laptop or PC. Instead, consider investing in a dedicated external interface for better results.
An audio interface is a foundational piece of equipment for any home studio. Most audio interfaces enhance recording quality and are a crucial tool in any beginner’s arsenal.
Starting Simple
Start with a basic interface and upgrade as your skills and requirements evolve. This gradual approach allows you to grow your studio setup over time.
Wanna understand more?
Check this article here: Best Audio Interface for Beginners: Top Picks for High-Quality Sound
Audio Interface Software
DAW Integration
To maximize its capabilities, ensure the DAW you choose is compatible with your audio interface.
the DAW is your primary software requirement: this is where you record, edit, and mix your audio. Different interfaces have different levels of integration with DAWs, so it’s important to consider this when choosing an interface.
Some popular DAWs include Cubase, Pro Tools, Logic Pro X, Ableton Live, and FL Studio. So, make sure to do research on which interfaces are compatible with your chosen DAW.
Another important factor to consider is the software that comes bundled with the interface. Some interfaces come with their proprietary software for processing and recording audio. Others may include plugins or digital audio workstations (DAWs) as part of a package deal.
This can be a great way to save money and get all the necessary tools in one purchase. However, if you already have the preferred software

Conclusion
Setting up an audio interface is a straightforward process when you understand the basics. By following these steps and optimizing settings like buffer size and latency, you’ll produce high-quality audio with ease.
Free the power of your audio interface, and elevate your creative projects to new heights!
Suggested Readings
Best HP Laptop for Music Production
Practice and Enjoy!